This page is a reference guide and basic tutorial for using Lingonaut’s Creatonaut 3. It will cover the basics of how to get started and create a basic course. After that, it will break down the available options and how to use them.
What is Creatonaut 3?
Creatonaut 3 is the course creation tool that Lingonaut uses to build new language courses to use in the app. The tool is available to anyone who wants to use it, and it stores it’s data locally within the browser. This has two consequences:
- Privacy: Only you have access to the course you’re creating. This gives you the freedom to experiment and break things as you learn without concern for it being seen or causing issues for other Lingonaut or Creatonaut users.
- Data retention: If your browser clears your local storage, all your hard work is gone. No second chances. Export your course often! Some browsers may clear local storage when your computer or tablet is low on batteries.
Important note
Creatonaut is very new. It is likely to change often and contain bugs. Save often.
There is currently a bug that will empty your session as soon as you click “Open Project.” Be very careful when using the File menu to Export your project that you don’t accidentally click this button or you will lose your data. This issue has been reported to the developer.
Lastly, Creatonaut is not designed to be used in mobile browsers, as it requires the use of the right-click function.
Creating your first course
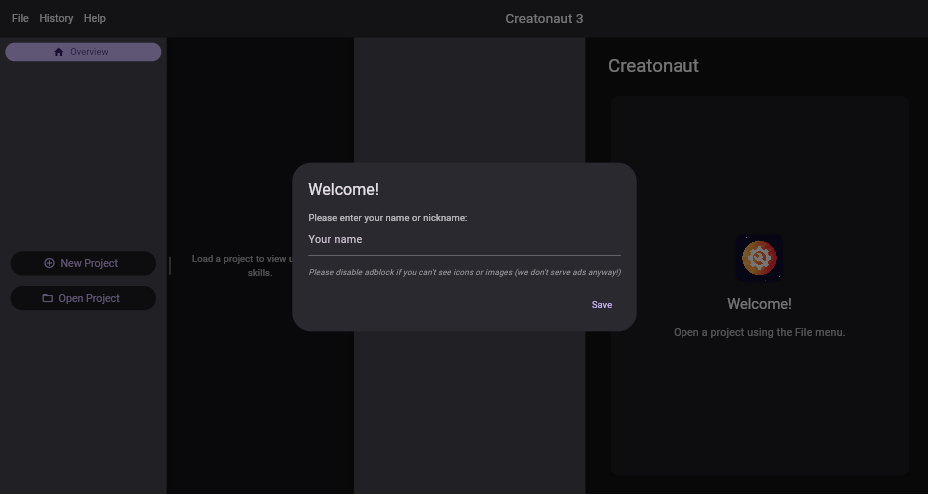
Now that you understand what Creatonaut is, let’s jump into creating your first course. Go to the Creatonaut 3 website at https://creatonaut.lingonaut.app/
You’ll be asked to enter your name or nickname. This is used to keep track of who is making changes to your course(s) and to give you credit. It is suggested to set this to your Lingonaut username.
Once you’ve entered your name, you can create a new course by clicking the “New Project” button and giving your project a name. Creatonaut will create a basic course layout for you as shown below. Let’s go over each of the panels in order.
Creatonaut layout
Creatonaut’s layout is expected to change. Please keep an eye out for notes about these changes.
Project Files Panel
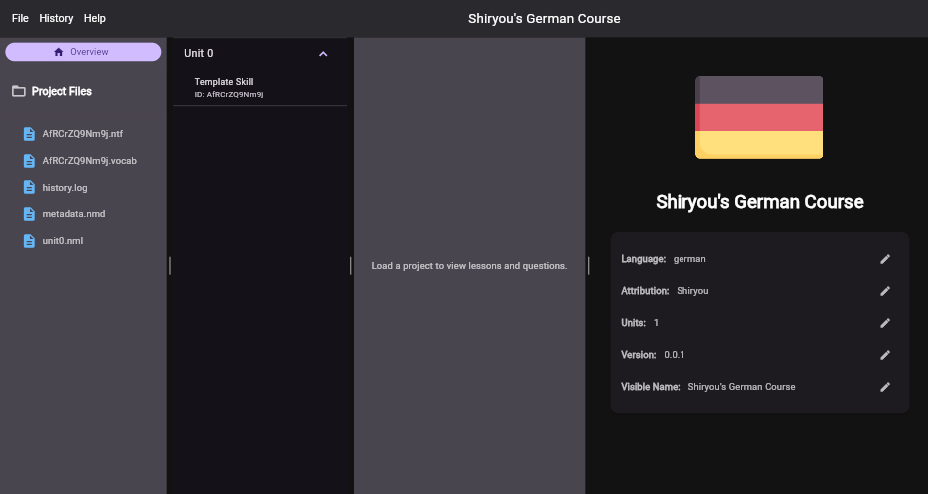
This panel is hidden by default and can be enabled with View → Show Project Files.
The Project Files panel gives you an overview of the files that are part of your course. This will include the basic metadata (it’s name, who created it, it’s version, etc.), the unit definition files, your vocabulary and sentences lists, and any audio files you create.
For most of the time as you create a new course, you won’t need to pay much attention to this panel as everything within it will be created and modified using the other panels.
When you export your course using File → Export Project (.cn3), Creatonaut will create a zip archive containing all of the files listed in the Project Files panel.
Unit and Lesson Panels
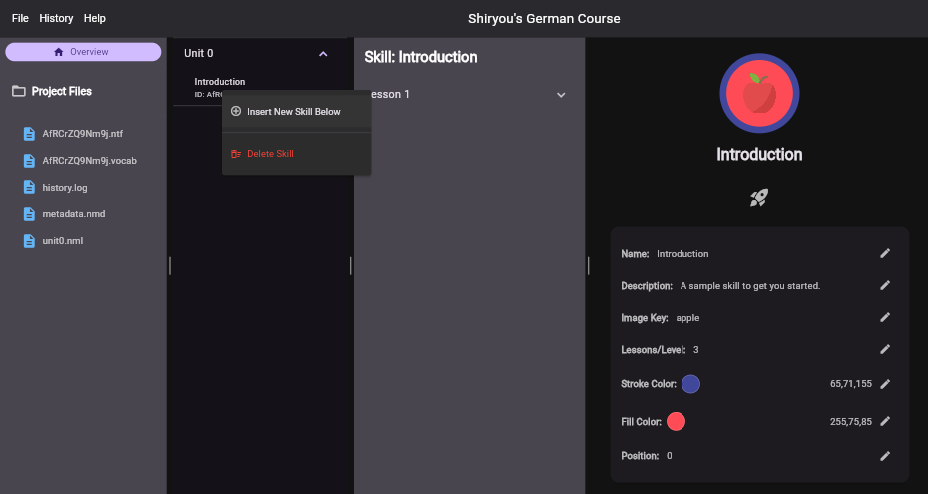
The second panel is the Units Panel. This lists all of your units, along with each unit’s skills and the skills’ unique IDs (if enabled). You can also create new units and skills or delete existing ones by right-clicking on this list, as shown above.
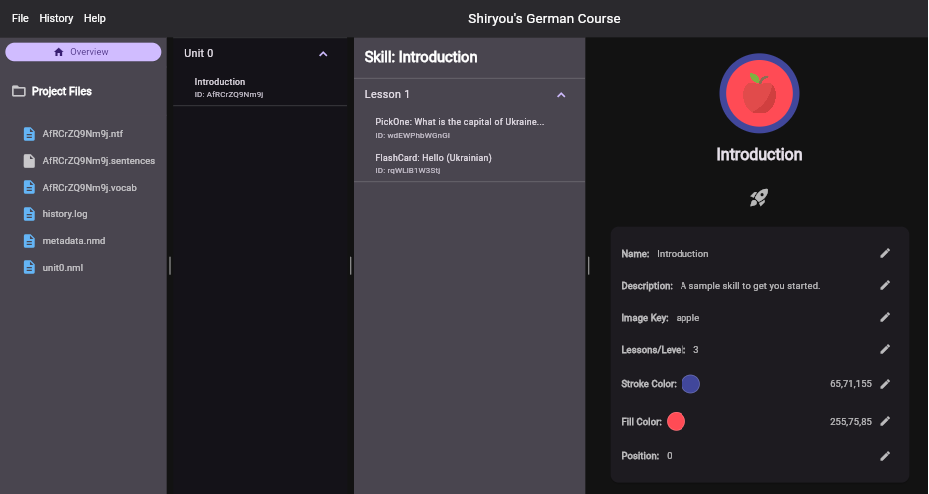
The third panel is the Lessons Panel. This lists all of a skill’s lessons, along with the questions associated to them and the questions’ unique IDs (if enabled). As with the Units and Skill, you can create and delete lessons and questions by right-clicking.
To review, a course’s hierarchy is: Unit → Skill → Lesson → Question
Be careful not to remove the last skill in a unit or the last question in a lesson, as you will no longer be able to add new ones.
Note: IDs can be enabled by using View → Show IDs. For the most part you can ignore the ID numbers shown as they should never be very relevant to creating your course. They are an important part of protecting against naming conflicts within your course. If you have two units named “Basics,” Lingonaut will be able to distinguish between them by using their IDs internally. While it’s generally best to avoid naming multiple units the same, this gives you the flexibility to replace units without worrying about conflicts.
Editing Panel
The fourth panel, on the far right, is your editing panel. This allows you to make changes to whatever item you currently have selected, whether it be the Course Overview, a unit, or a question.
Course Overview
The course overview contains the metadata that allows Lingonaut to understand what your course is about, which language it is associated with, who created it, and what the verison number is. Let’s go over these fields in detail:
- Language: The language that this course covers.
- Attribution: Who contributed to this course. This should generally include anyone editing the course in Creatonaut, voice actors, translators, etc.
- Units: The number of units contained in the course.
- Version: The version number. This helps Lingonaut keep track of which courses have been updated and which copy of the course is the latest.
- Visible Name: The name for the course that people will see in Lingonaut.
Skill overview
Clicking on a skill in the Unit Panel will display the Skill Overview. This contains the metadata for a particular skill:
- Name: The name of your skill.
- Description: A description that tells people what they can expect to learn.
- Image Key: This is the display image. Click on the existing skill image (the apple in the screenshot above) for a selection menu.
- Lessons/Level: The number of lessons per level of the skill when using the automation tool.
- Stroke Color: The color of the circle around the display image.
- Fill Color: The background color behind the display image.
- Position: Currently unclear. Presumably allows re-arranging the order of skills, but doesn’t appear to have any effect in Creatonaut.
The rocket button opens the Automation Wizard. This is a feature that is not yet available. This will use your vocabulary and sentence lists to assemble exercises based on the number of lessons per level you define. For example, if you specify 4 lessons per level, the Automation Wizard will create 20 lessons, where the first 2 lessons are level 1, the next 2 are level 2, etc.
Creating questions
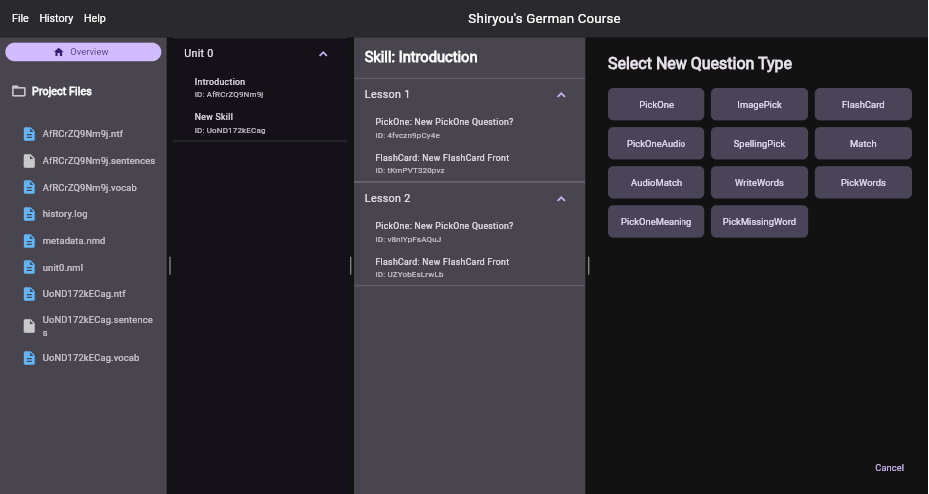
Lingonaut supports 11 different types of questions to give learners different ways of interacting with the language lesson. We’ll give a brief overview here, then dive into each one in detail:
- PickOne: A standard multiple choice question.
- ImagePick: A multiple choice question that includes an image for each option.
- FlashCard: A standard flash card, containing a phrase on the front and it’s translation on the back.
- PickOneAudio: Select the correct audio sample based on the question..
- SpellingPick: Select the correct spelling of a word based on the question.
- Match: Select the matching items from two separate lists.
- AudioMatch: Select the text that matches each audio sample.
- WriteWords: Write the answer to the question.
- PickWords: Translate a sentence by picking the correct words.
- PickOneMeaning: Pick the correct meaning based on the question.
- PickMissingWord: A standard fill in the blank question.
Note: For an ImagePick question, you must write out the word for the image you want. Unlike the Skill Overview section, there does not appear to be a way to pop up the image selection screen.
Notable changes
- 2025-05-14: The Project Files panel and skill and question IDs are hidden by default and can be shown using View → Show Project Files and View → Show IDs, respectively.